
Find me here
October Newsletter
This month has been rather busy, I’m in the process of building a new studio. It is nothing fancy, just a sectioned off area in one of our outbuildings, but it means that I can now set up my lights and work on a project for as long as it takes without having to constantly take everything down, pack it all away and then put it back up the next time I need to use it. For my needs, this is great, but it has only become necessary in the last few years. Before that I happily used the kitchen table or my office to practice both taking shots and editing.


These are four abstract shots that I took using a squirt if cream cleaner onto the glass cooker top.
I then just cleaned the cooker taking shots from different angles. Afterwards I transferred the images into Lightroom and played with them, initially at random, then aiming to create specific colours. This is only one set of images that I have taken in order to practice towards specific goals. Perspective, Macro and light refraction are only a few of the things that one can practice indoors.
Why am I talking about indoor photography? Because the clocks have just changed and winter is coming.
There will be many days when the weather is kind and we can still get out with our cameras, but there will also be many where we are stuck in the house; these are the days that we can use to be very productive and hone our skills in a whole range of different aspects of photography.
Depth of Field
What is Depth of Field? (DoF) is the distance between the nearest and furthest elements in a scene that appear to be "acceptably sharp" in an image. The following images illustrate this.


In the first image the front three batteries are “acceptably sharp”, in the second image, only the front battery is sharp. The second image has a shallower DoF than the first. The DoF is governed by the Aperture, (the f number). The smaller the f number, the shallower the DoF. For example, a photo taken at f3.5 will have a much shallower DoF than one taken at f11.
At this point, I could go into a long explanation about the size of your aperture opening and how this dictates your DoF, however, I feel that it is better to suggest a simple exercise that will allow you to understand the concept quickly and easily.
For this exercise you will need three or four cans, jars or bottles, anything really where they are all the same and will fit comfortably on a table; a camera that allows you to adjust the settings and a table or surface with room to set up your items.
- Set up your items in a line away from you, spacing the evenly.
- Set your camera to Aperture Priority, (A or Av on the wheel on the top of the camera). This means that when you change your setting, you will only be changing the aperture. The shutter speed and ISO will compensate automatically for each change that you make.
- Set your camera onto auto focus and centre spot focus. If you are not sure how, press your function button and find your focus areas, scroll down until you find one with a small dot in the centre of a square, that will most likely be the centre spot focus sign. Choose that one.
- Start with the lowest f number that your lens allows, this will be something like f2.8,
f3.5 or f4.0.
5. Focus on the front item and take the shot. You should find that only the front item is fully in focus and that the other two or three items are blurred to a greater or lesser extent.
6. Now change your aperture to f5.6, focus on the front item again and see the difference, more of the items will be in focus.
7. You can try going up the f numbers, i.e., f7.1, f9.0, f11 etc. The higher the f number the greater the DoF.
Because this is indoors, you will probably find that after about f7.1, most of the room will be in focus. However, if you are using any form of zoom lens, try playing with the zoom and watch what happens.
Light Refraction
Playing with colours and water.


1. You will need a clear glass three quarters full of water and some coloured card or paper.
2. You can see from the images above how this works. The concept is simple, but the DoF and focus are important.
3. Your DoF cannot be too shallow because you are actually photographing the paper at the back as well as the glass.
4. In my images I used f7.1 in aperture priority in a well-lit room, (no flash). I also used a spot focus area.
5. I would suggest that this is a good exercise to experiment with focus areas and see which one you think suits taking this type of photo the best.
There is one other type of photo that I practice on a regular basis and that is seeing the effect of light on an object. This is broken down into two parts, photographing shiny objects and photographing dull objects; and they are totally different.
Lighting Objects
The following exercise I have done using only household lights, a torch or table light.
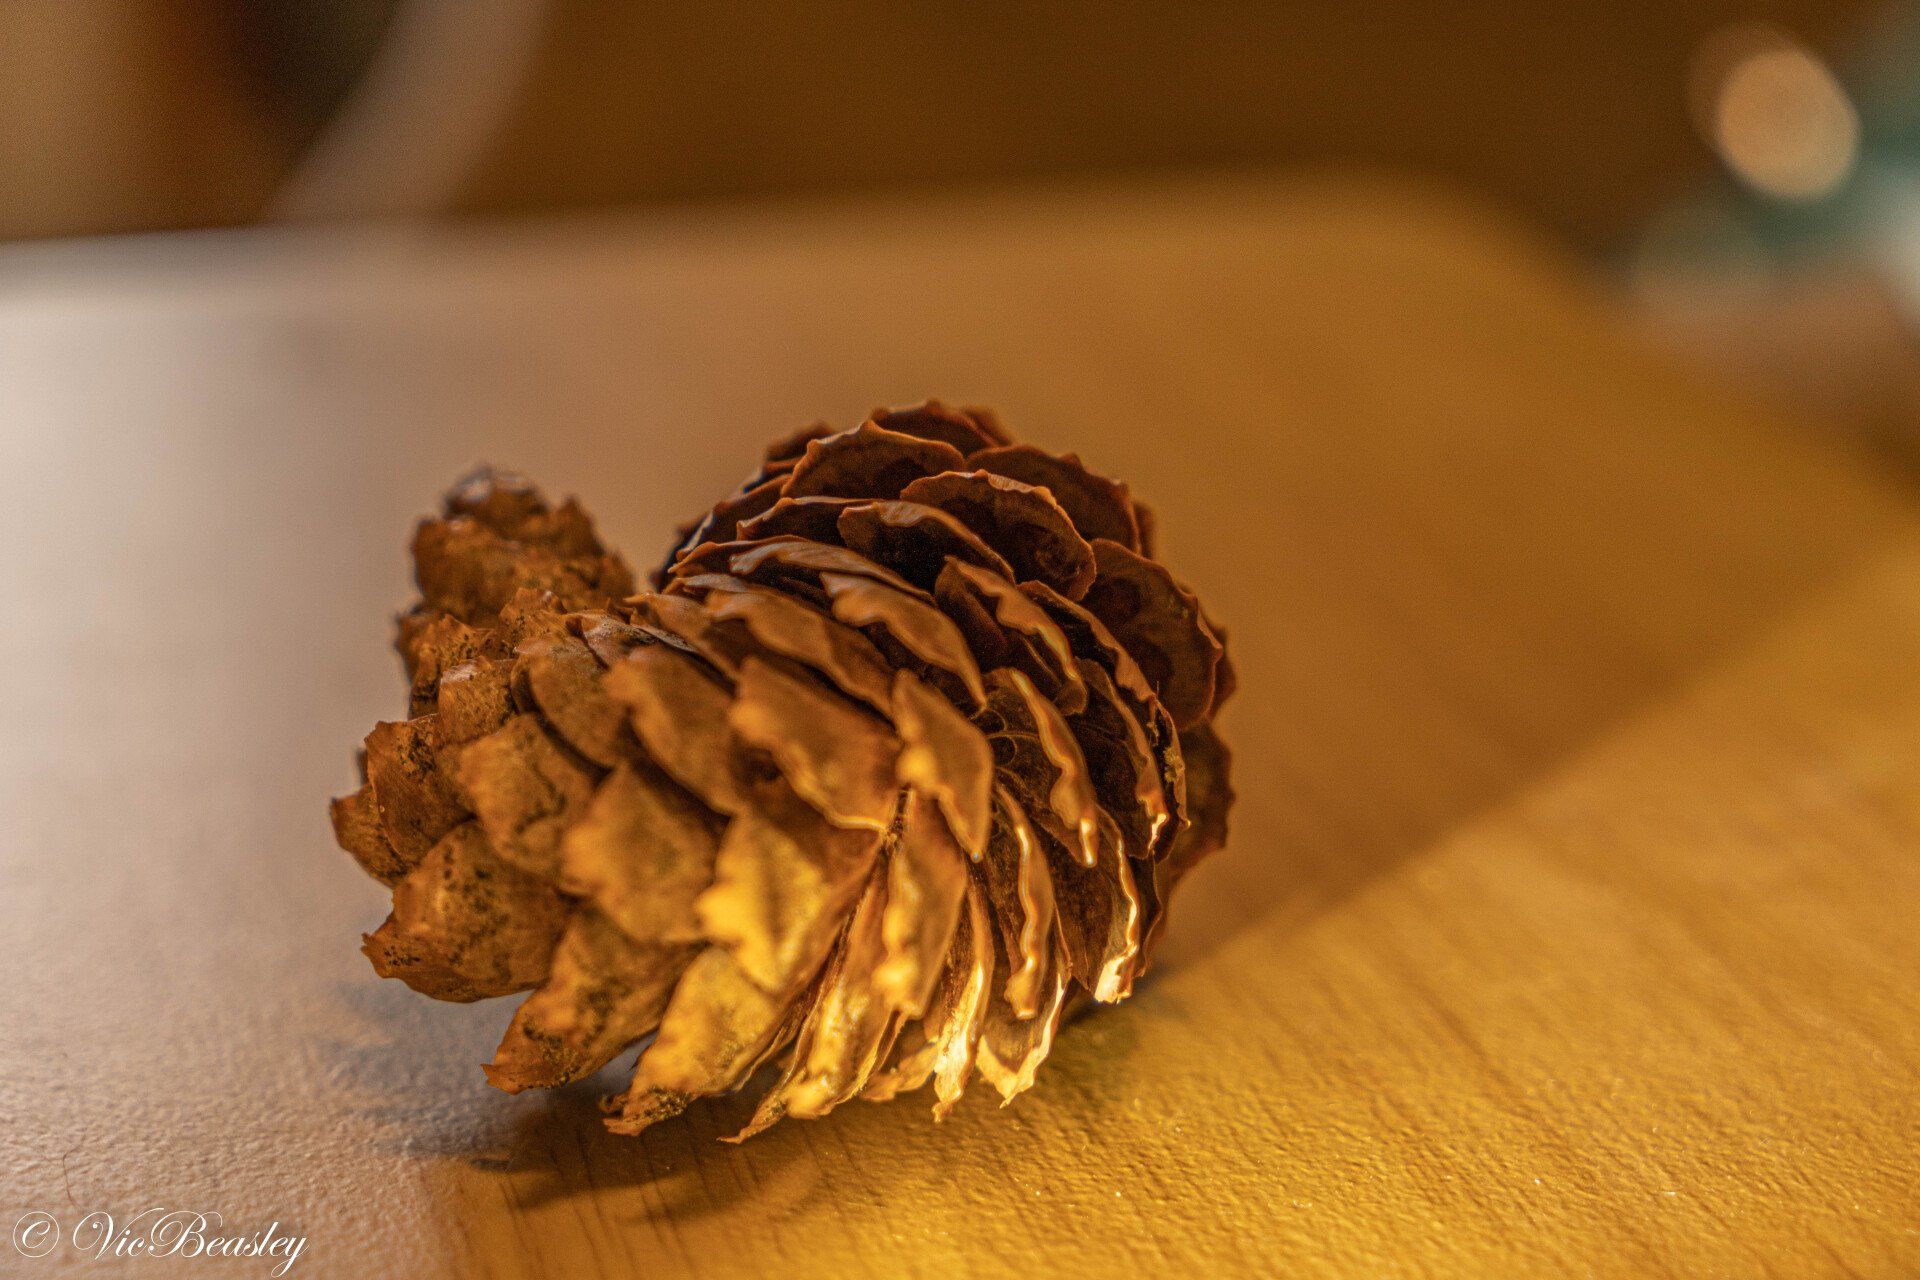


1. The top images of a pine cone were taken in a well-lit room, but using a simple torch to highlight areas of the cone. They show some shadow, but no reflection.
2. The three lower images are of a very shiny powder compact. Only one of the images is lit correctly.
3. For this exercise you will need various types of household lighting, possible some form of diffuser, (paper napkin, tissue paper, net curtain etc.).
4. As with the other exercises, leave your camera on aperture priority.
The main purpose of these, and any other exercises that you find on line, is to practice whilst having fun, on days when you can’t get out to take real photos. Even with my studio being right here, I will often watch a video and make some changes to my camera settings, then just turn and photograph a carving on my office wall to see if the changes are what I want or not. See below.

Editing
Unless we choose to only shoot JPEGS, we have to edit our images. Even shooting JPEGS, we sometimes need to crop images.
The question is, ‘What editing software should one use’? There are many programmes on the market, some are good, some not so good; some are very expensive, some cheap and some free. It is a difficult question and I am not going to even try to tell you which one to use. What I am going to do is give you some ideas of the free ones and some prices for those that cost. Finally, I will tell why I use the one that I use.
The following list was compiled using information researched by Digital Camera World. I can only verify the information about one of the programmes. The list is in no particular order.
· Gimp – Free – Compatible with all computers
· Paint.net – Free – Compatible with Windows
· PhotoScape X - Free – Compatible with Windows
· Capture One 22 – US$19 Mnth – All computers – all cameras
· Affinity Photo 1.10 - £47.99 – Mac or Windows (I found this to be complicated to use)
· DXO Photolab - £129 – Mac or Windows (A photographer friend swears by this programme)
· Luminar Neo - £111 – Mac or Windows
· Adobe Photo Package - £9.98 Mnth – Mac or Windows (Includes Photoshop, Lightroom CC, Lightroom Classic & Camera Raw in the price)
The only programmes that I can recommend are the Adobe ones and not even all of them. While they are all top of the range programmes and great value for money, I find Photoshop and Lightroom CC much less user friendly than Lightroom Classic. My personal choice and the one that I use constantly, is Lightroom Classic. I have bought into the package and have all four programmes available to me with updates for life. I use LRC daily and will export into Photoshop to do things that LRC is not yet capable of doing. If I send a RAW file to Photoshop, it will go via Camera Raw. I do not use Lightroom CC, I don’t find it as intuitive as LRC and it is Cloud based, which means that I would have to pay for storage, as I take a lot of photos which are huge files due to the megapixels on my camera.
Lightroom Classic does 99% of what I need, it is intuitive to use as it is slider based, it is non-destructive, so I can’t mess up a photo and the storage system is easy to use and makes finding an image, even years later, relatively simple. The cost, at just over £500 per year is acceptable to me as it includes constant updates.
The one and only downside to these programmes is that they are large programmes that use a lot of memory, especially if you have them, LRC & PS, open at the same time.
I currently have 16GB of RAM on my PC and I’m about to up that to 32GB. Another photographer told me recently that, when he upgraded to the latest version of LRC, his laptop couldn’t handle it.
My plan, over the winter, is to stay on this theme of things that can be done indoors and will be useful long term. I hope to do more on editing next month, with some other fun ways to shoot indoors. Then we could look at different types, (not makes) of camera and their uses. After that we will be in January and the first Snowdrops will be coming out, so it will be a good time to start thinking about shooting spring flowers and buds.
I hope that this has been useful to you. Please email any comments to, vic@vicbeasleyphotography.net , also, if you would like to sent any images to me, I will be happy to comment on them.
Enjoy your photography,
Vic